Introduction
Payment API Gerencianet
The Gerencianet Payment API make available the services to pay charges. With this API it is possible to check bills to pay, sen requests to pay it and verify the statuses of this payment.
Understanding the application escopes
When creating or editing an application on you Gerencianet account, it's necessary to set the scopes in which this application will have access to. The choices of scopes defines the actions that the application is allowed to request through the API.
The following list is the scopes available in the Gerencianet Payment API, and your descriptions:
gn.barcode.read- It givesermission to check the charges to be paid;gn.barcode.pay.write- It gives permission to send a payment request;gn.barcode.pay.read- It gives permission to read payments already done;
Setting the scopes
To use the Gerencianet Payment API its necessary to configure the scopes above and to use that, please contact our Discord community on the channel "api-pagamentos"
OAuth2 authentication
The process to authenticate in the Gerencianet Payment API follows the [OAuth2]((http://oauth.net/2/) process, in this process, it is included the security certificate generated in your Gerencianet account. Through this, the OAuth2 authentication can access the authorizations of you application and authorize or deny the requests.
For more details regarding authentication with OAuth2, just click on the button below:
Authorization
The Payments API requires the use of a PFX(.p12) certificate that is generated in your Gerencianet account. The Auth2 provides an authorization mechanism called mutual Transport Layer Security (mTLS) through the certificate created in your Gerencianet account, this method adds another level of security to the requests between your application and the Gerencianet Payment API.
For more details about the PFX(.p12) creation and the mTLS pattern, just click on the button below:
Setting tests on Postman
To proceed with the Postman configuration step, you must have:
- A pair of
Client_IdandClient_Secretcredentials of an application registered in your Gerencianet Account; - A P12/PEM certificate generated in your Gerencianet account;
- The Postman software installed on your computer (If you don't have it, click here to download it);
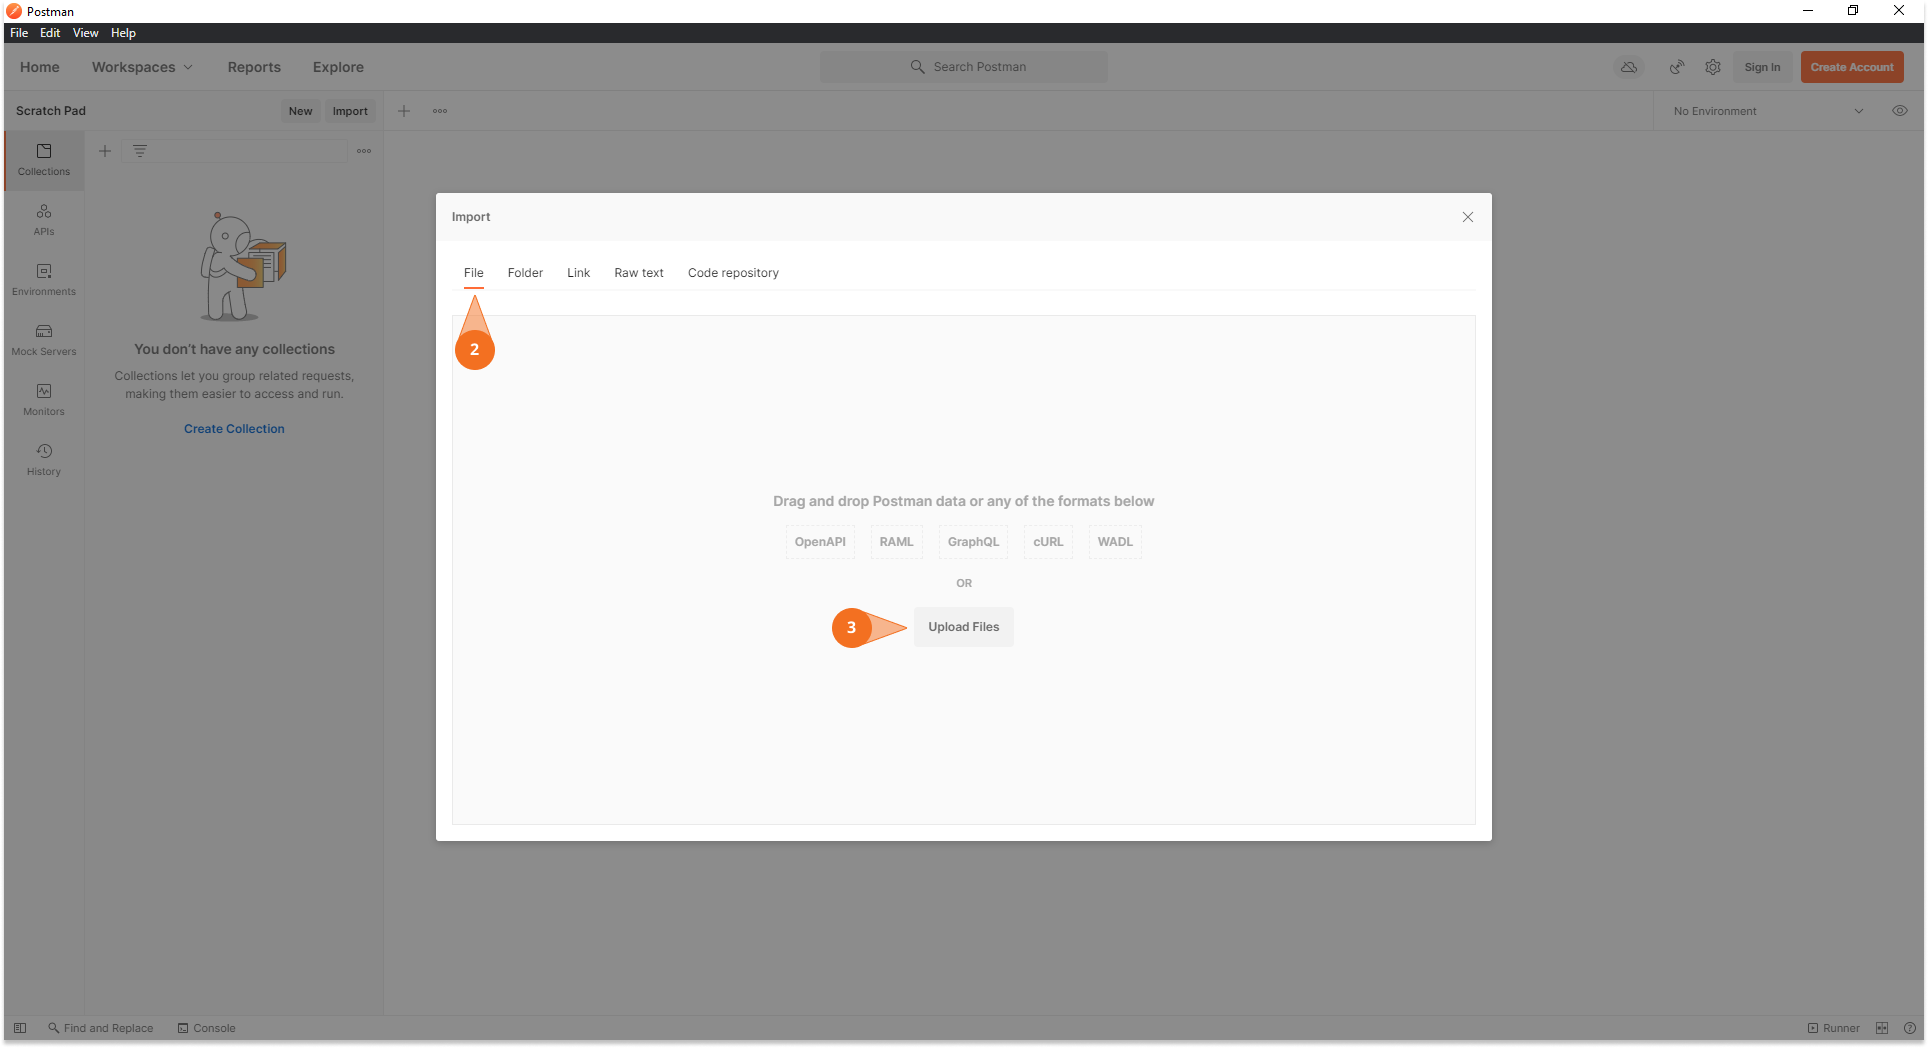
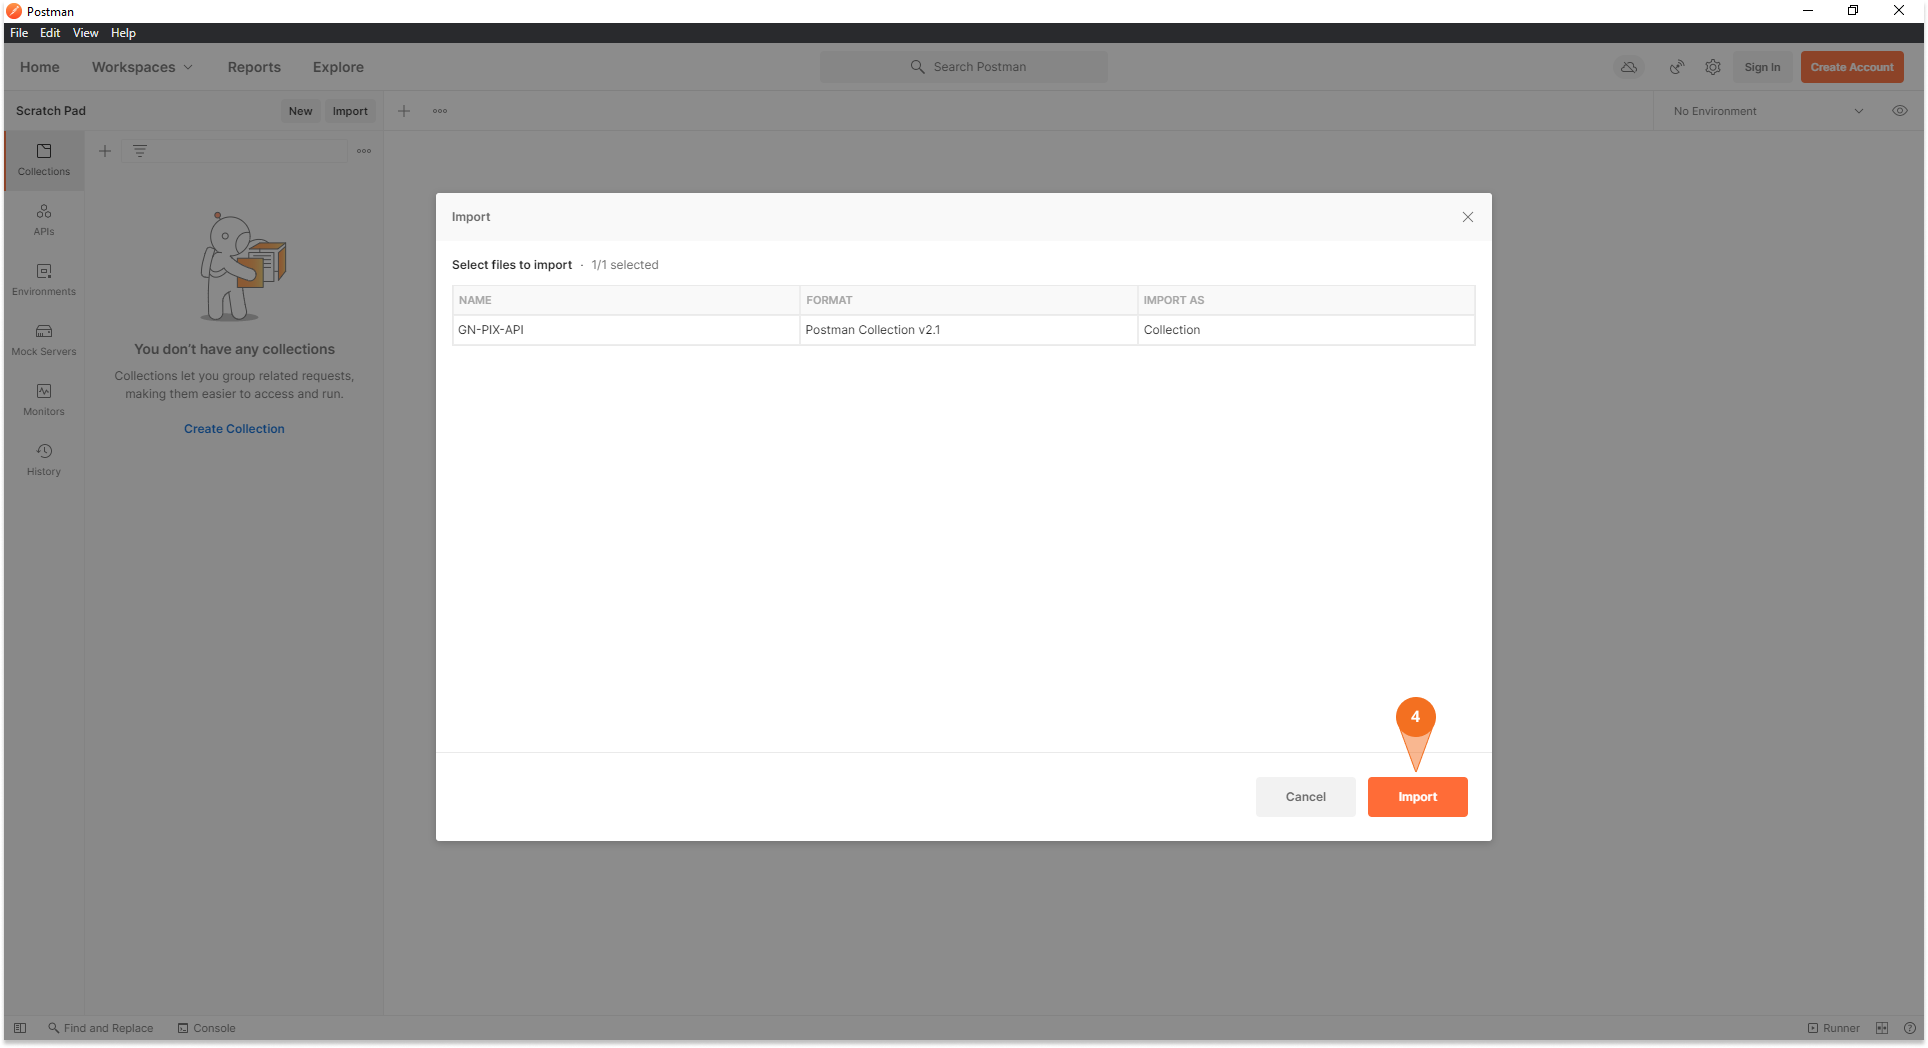
1. Importing the Payment API Collection
This is the link to our Collection that we will keep updated with the Gerencianet Payment API endpoints.
- With Postman started, use the shortcut
Ctrl+Oto open the import screen; - Select Collection file;
- Click Import
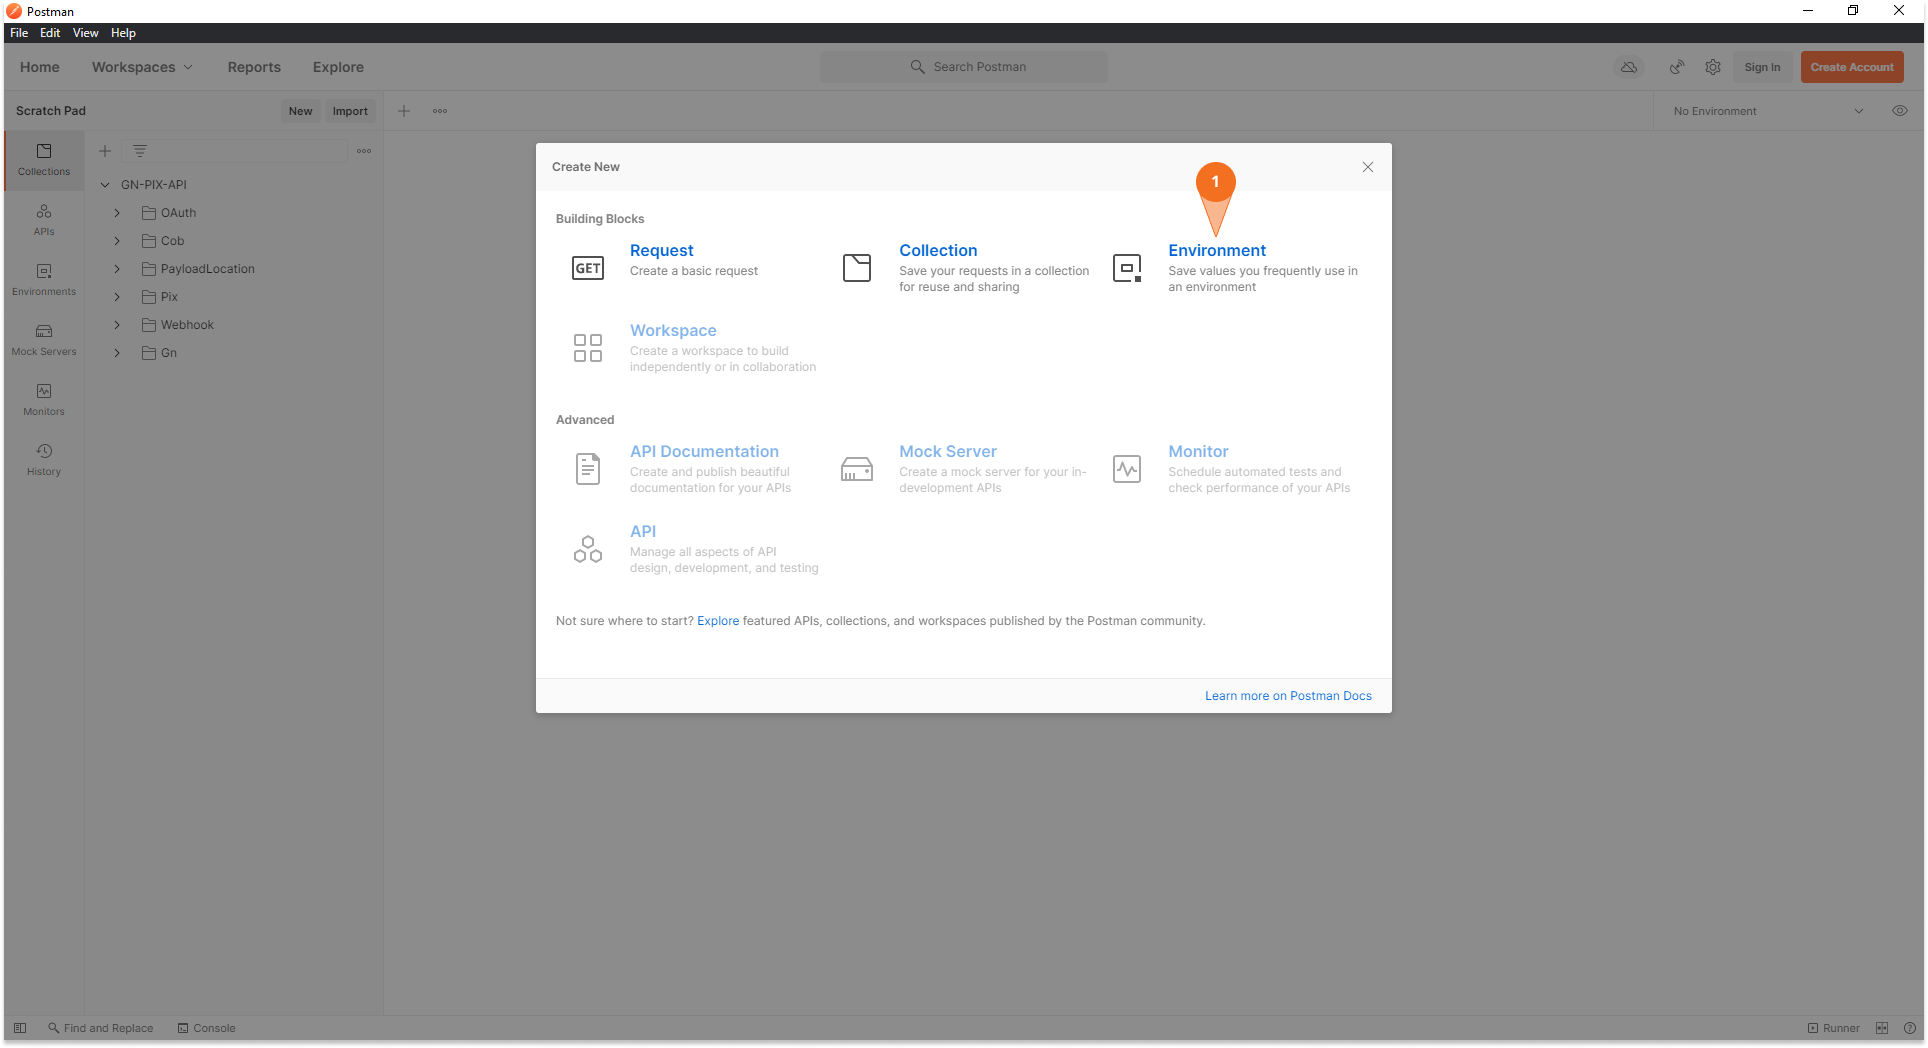
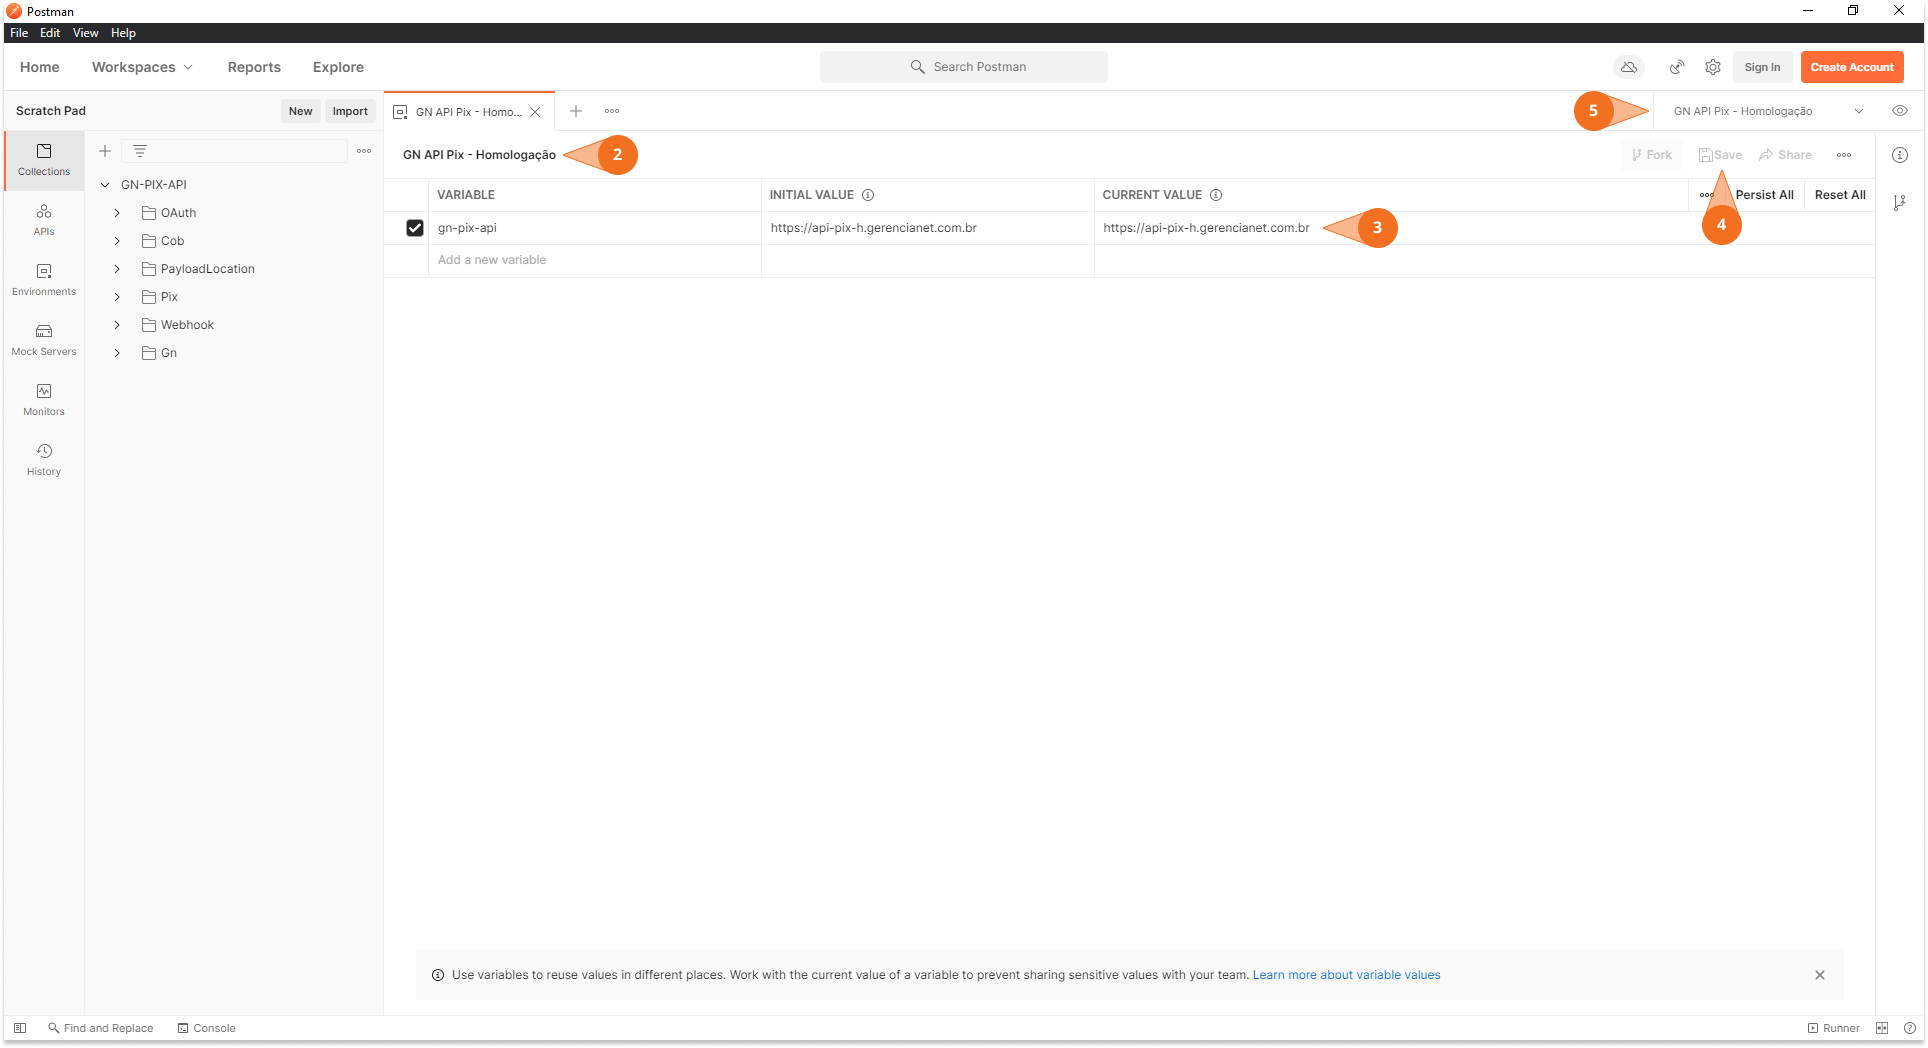
2. Creating an Environment
Creating an Environment in Postman is necessary for some automations built into the collection to work. These automations are designed to make it easier for developers during testing.
With them you need to request the authorization only once, and then the access_token is recorded as a Postman environment variable, available for use in subsequent requests.
To create an Environment follow the steps below.
- Use the
Ctrl+Nshortcut and select 'Environment'; - Give a name specifying whether this Environment will be pointed to the production or homologation environment;
- Create the variable
gn-api-pagand as initial value enter the URL of the Production or Homologation Payment API; - Save your Environment;
- Select the desired Environment, so Postman will understand the created variable.
The images below shows the steps above. As an example, an Environment was created for Gerencianet Payment API Production environment.
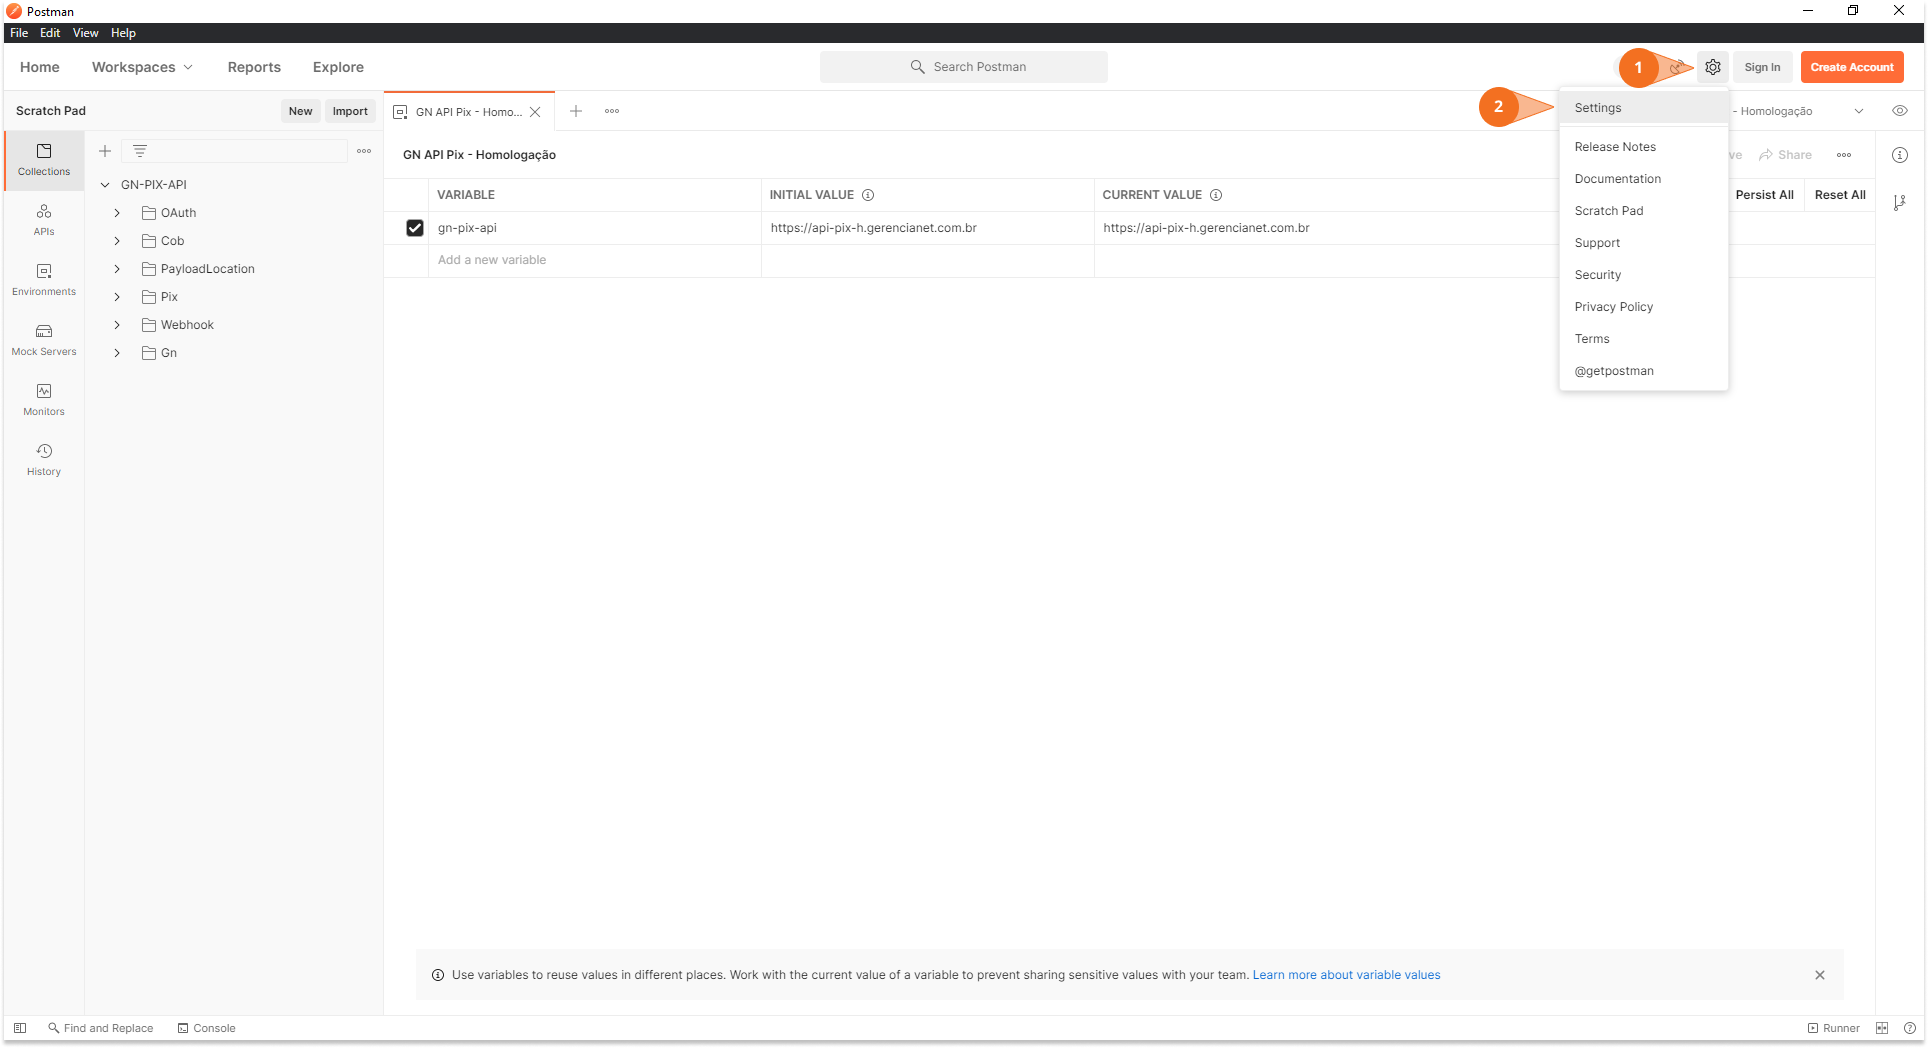
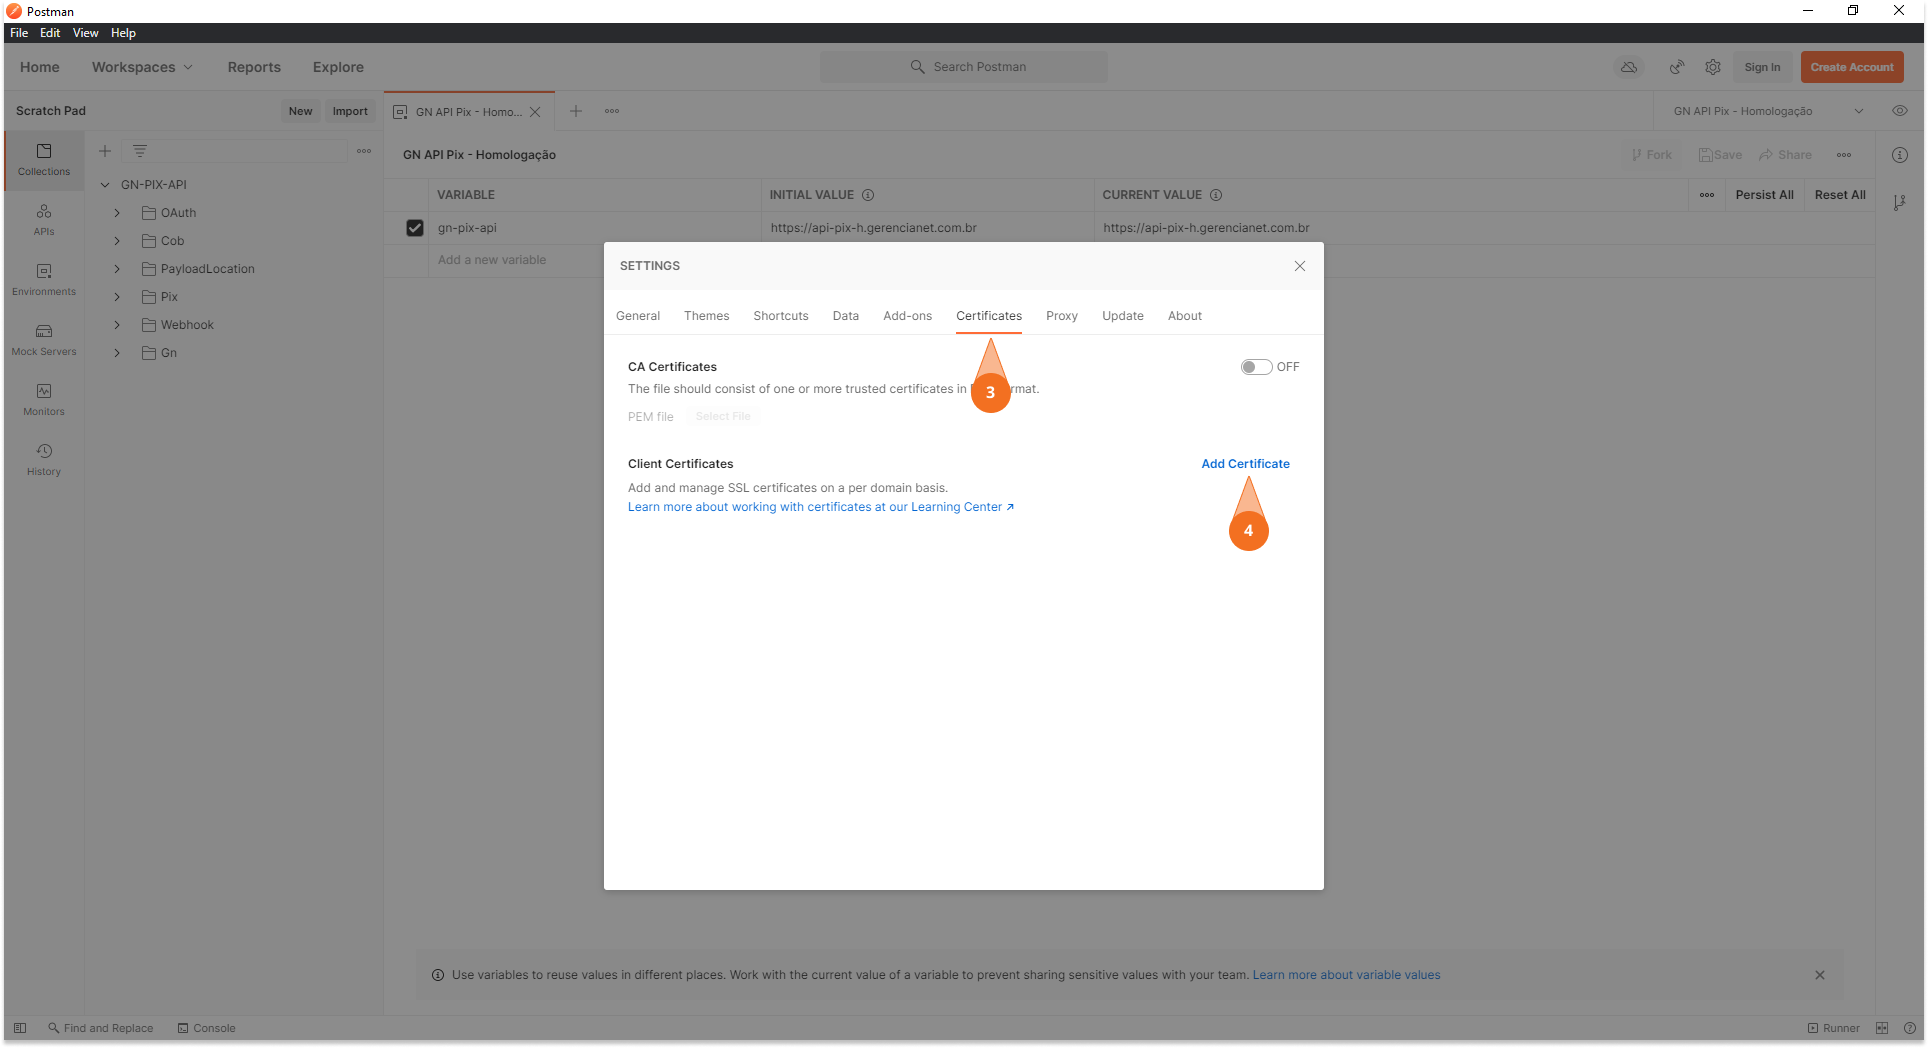
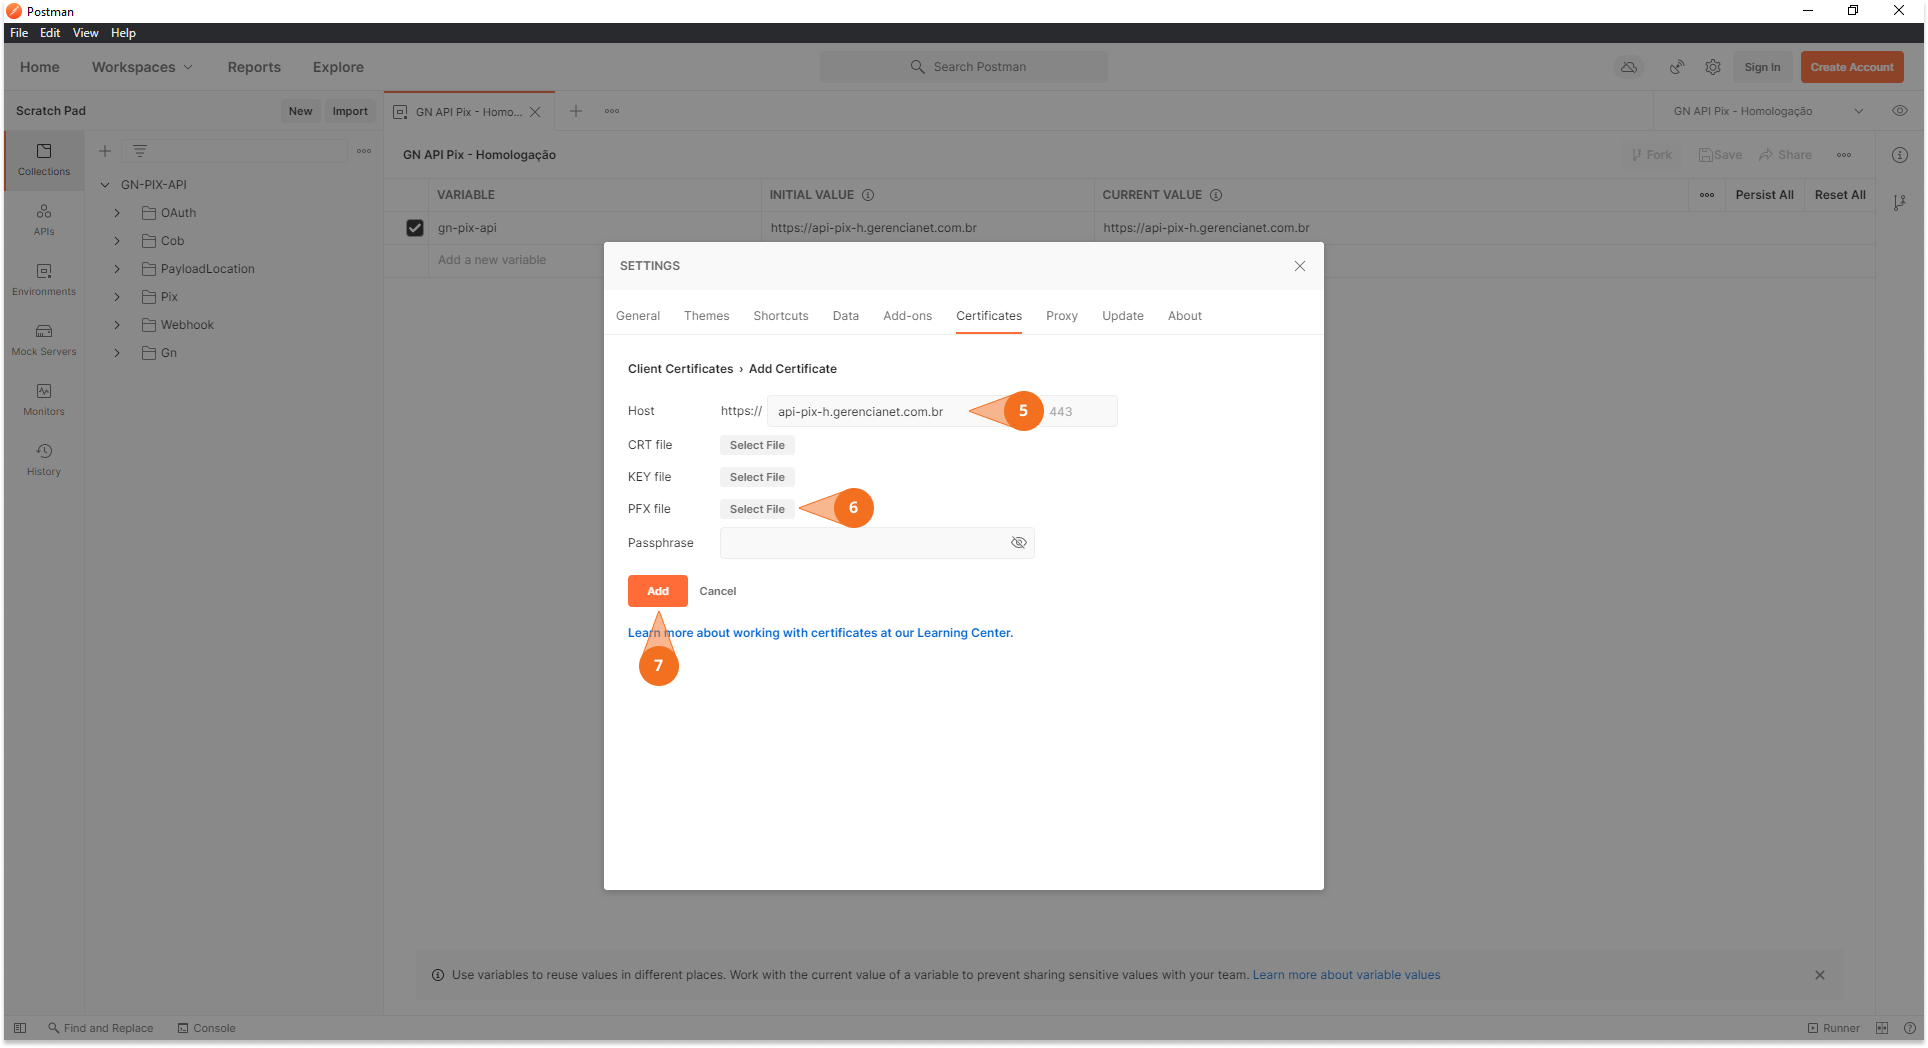
3. Setting the certificate in Postman
All requests made to the Gerencianet Payment API need the certificate generated in your Gerencianet account. Therefore, to help you testing Postman, follow the steps below to configure the certificate usage during requests automatically:
- Click the gear icon in the upper right corner of the Postman;
- Then click "Settings" to open the settings;
- In the top tab, click "Certificates";
- Then click on "Add Certificate";
- In the configuration window of the new certificate, fill the "Host" field with the Base Route of the environment to which the certificate belongs (Production or Homologation);
- Use the "PFX File" field to tell Postman where your P12/PEM certificate file is located;
- Finish by clicking "Add" to save your settings.
By following these steps, Postman will use the certificate for any requests made to the Host of the configured environment.
4. Assigning the Client_Id and Client_Secret in Postman
To complete the configuration of your Postman it is necessary to configure the credentials of an application of your Gerencianet account. These credentials are used for Basic Auth and to get the access_token from OAuth.
Follow the steps below to include the credentials and perform your first test in the Gerencianet's Payment API.
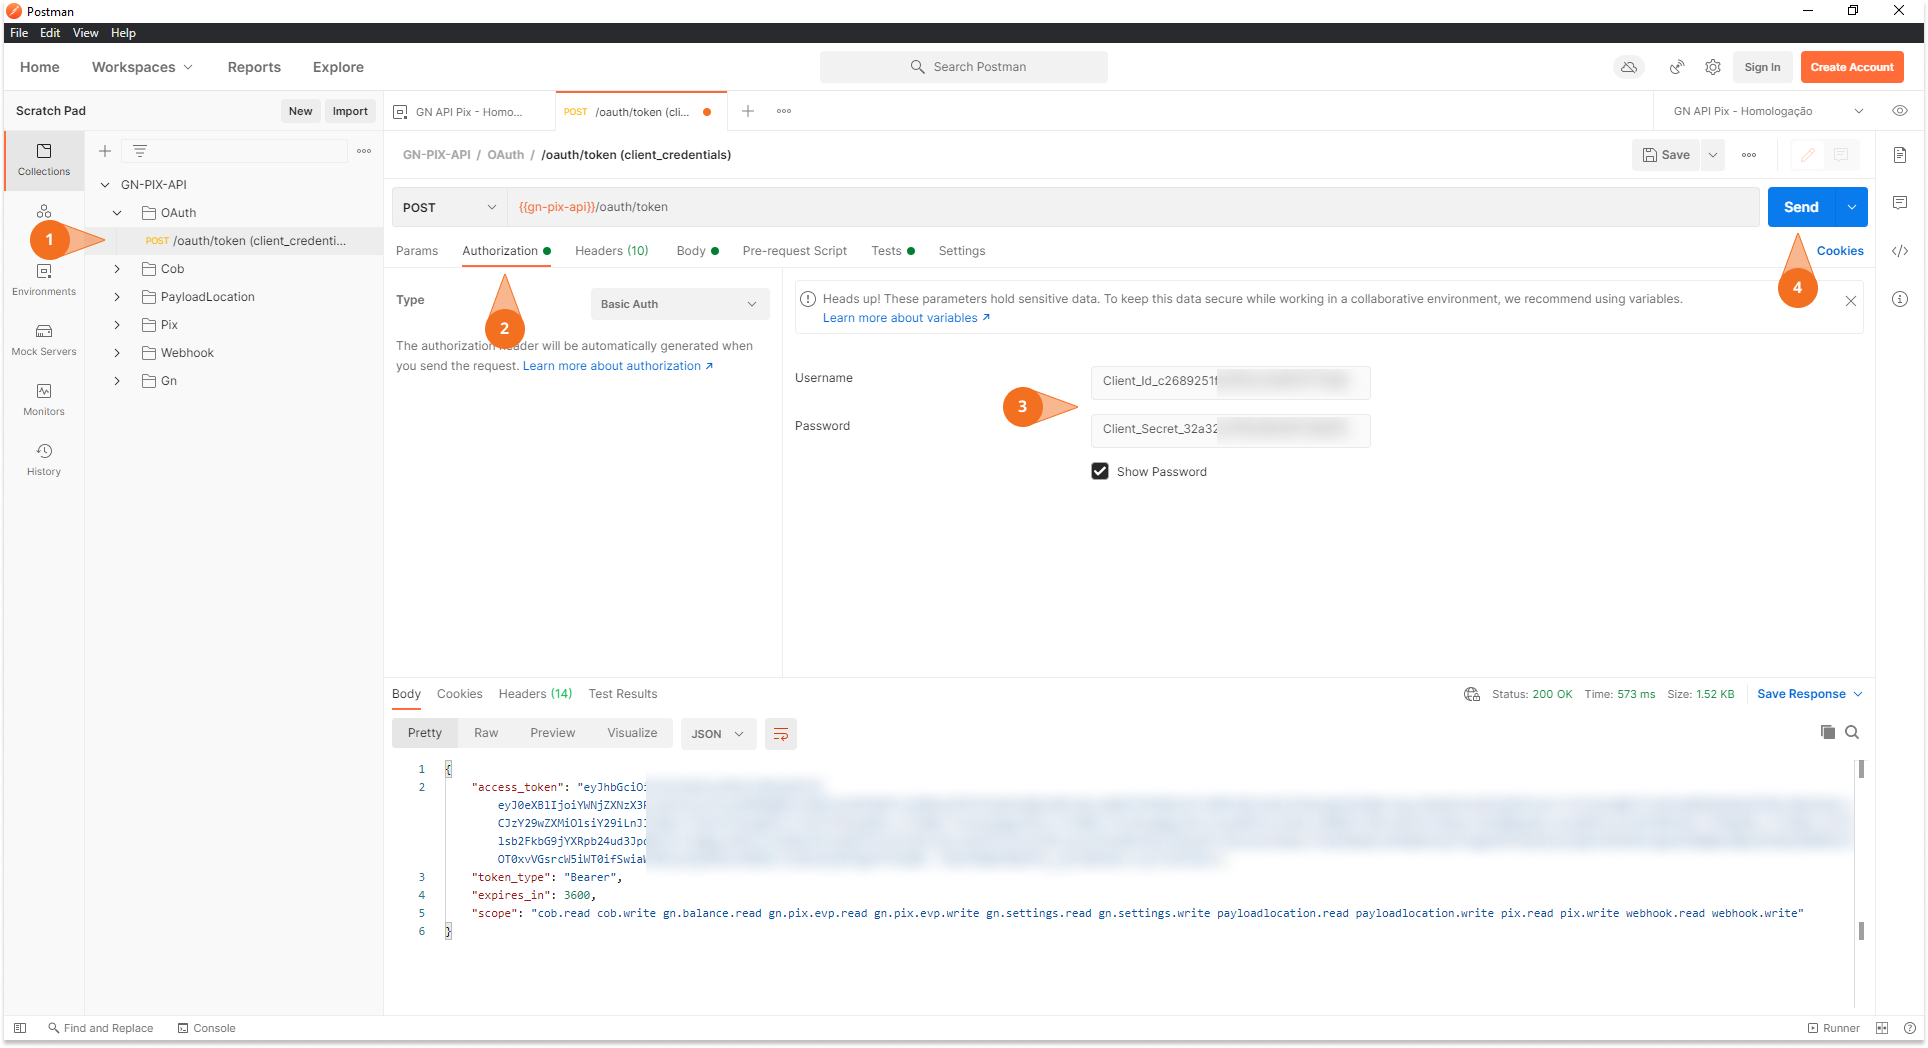
- In the imported collection, navigate to the
/oauth/tokenroute and double-click to open; - Go to the "Authorization" menu and make sure that the "Type" (authorization type) is selected as "Basic Auth";
- In the "username" and "password" fields fill with your application credentials, Client_Id and Client_Secret respectively;
- To test, click the "Send" button to submit the request
The image below illustrates the steps above. If everything was followed correctly, you should get a response in JSON format, containing the access_token, token_type, expires_in e scope (like the image bellow).